For decades, watches of less than 15 jewels have been considered by many to be "low end" and only suitable for those poor souls who could not afford anything better. This belief continues today, even among collectors of mechanical timepieces who, perhaps, might know otherwise. Well, this is fine by me, because that means there are lots of really nice watches to be had very cheap, and I love American-made watches as you might already know.
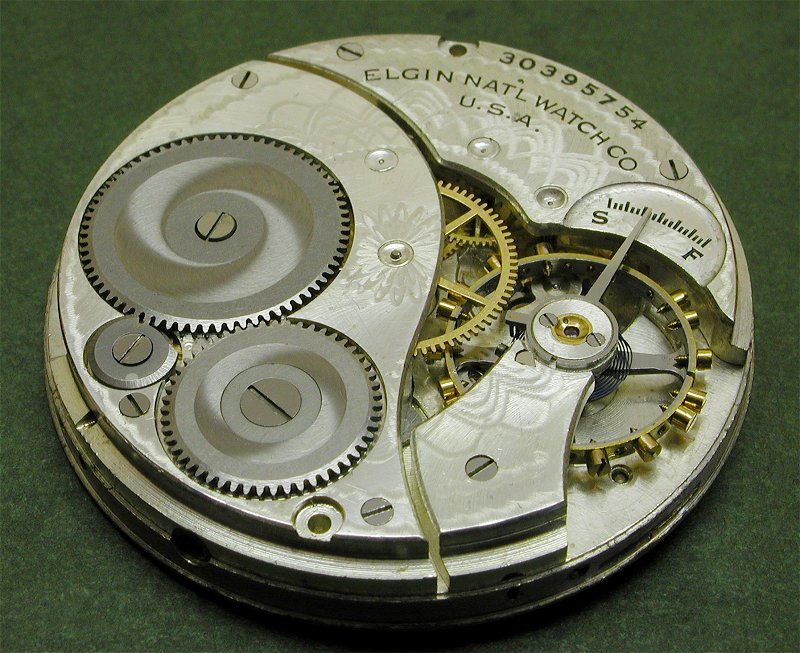
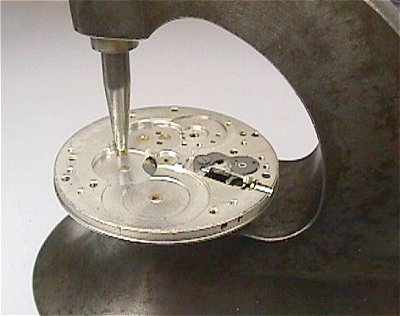
Paul Delury picked up this 7 jewel Elgin (shown above) on Ebay recently. It was sold as a running watch, and upon arrival it indeed was. However, it was not running all that well, so a full servicing was called for. (To be honest here, all the watches we buy get the full treatment, so I won't labor this point too much!) The timing machine showed a severe cyclical rate change over a 60 second period. We also noticed that the second hand was strangely offset in relation to the seconds sub-dial, and suspected a problem in this area. (Not visible in the pic above, as it was an "after" shot).
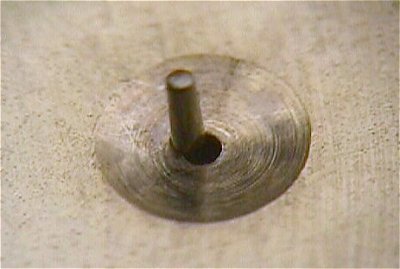
Upon uncasing the movement, it was a pleasant surprise to see it was in excellent condition cosmetically, showing very little sign of any previous attention. It always pays to carefully examine a movement for any signs of wear or damage before stripping it for cleaning, as afterwards lots of time can be wasted chasing problems that should have been noticed earlier. In this case, a visual examination revealed that the 4th wheel, on which the second hand is mounted, was leaning over on quite an angle. This can be clearly seen below, one side of the wheel is almost touching the pillar plate:

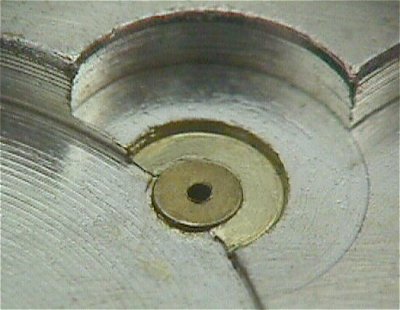
From the dial-side of the watch, it was clear that the hole in which the 4th wheel pivot runs was extremely worn, to almost double its original diameter in one direction.
For a watch that overall showed very little wear, this was quite strange. Normally, a 7 jewel watch wears the escape wheel holes the most, and the ones in this watch were fine. Closer inspection under a microscope after the watch was dismantled revealed the probable cause of this excessive wear. When the oil-sink was cut (the concave area around the hole to retain oil), it was machined too deeply, and left only about 0.1mm of bearing surface left. Over the 74 years hence, this wore down much faster than all the other holes. Also, this hole is a bit more exposed to dirt entering it, through the second-hand aperture in the dial. (Only lasted 74 years, shame on them!) Well I guess even back then, Quality Control occasionally slipped a bit. I think we'll forgive them for that, I reckon this watch has got at least a hundred or two years left in her yet.
The obvious question now is "Can we repair this watch?", and the answer of course is Yes! To repair this fault, the hole must be re-bushed back to its original and correct size. Surprisingly, this is not exceptionally hard to do, and a very serviceable job can be done with only simple hand tools, and some patience and care. So, let's get to work!
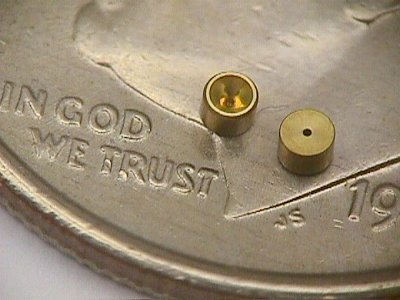 |
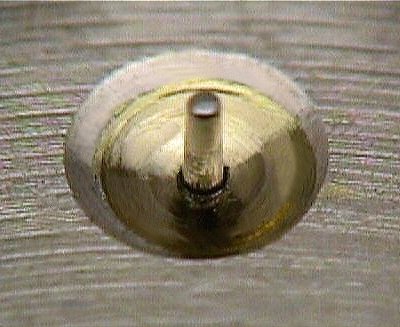
There are a number of ways of re-bushing a worn hole, and all involve opening the original hole out to a larger size, pressing in a new bushing, then drilling a new hole for the pivot. In this case, I have chosen to use "bouchons" from my materials supplier. These are small brass plugs with a hole drilled in them. The bouchons shown here (on a dime to give an idea of size) are 1.2mm diameter, 1mm long and have a 0.15mm hole drilled in them. After the bouchon is fitted, the hole can be broached out to the final size required, which is 0.2mm for this watch. |
 |
The original hole is opened out with a small broach first. Because the original hole was worn oval, I marked the true center on the dial side with a fine scriber, and as the hole is opened bit by bit, it is "drawn" back to the correct location. Technically, one should use an Uprighting tool (should you be so lucky!), but this way is quite satisfactory if you are careful. Once the hole has been brought back to its correct center, then you can use a larger broach. This should be done from the train side of the pillar plate. The hole is finished with a smoothing broach, which doesn't really remove much material, but burnishes the hole round and removes the broach marks, and leaves the hole slightly tapered. Care must be taken to make the hole very slightly smaller than the bouchon, so it is a press fit in the hole. Use a piece of 0.2 or 0.3mm brass shim as a test piece, trying a spare bouchon until the right fit is achieved. Mark the broach with a fine tipped marker, then you know where to stop. |
 |
The hole has been opened to the correct size and broached smooth. Then, use the small wheel-type chamfering tool to de-burr the hole both sides and make a small seat for rivetting the bouchon. The bouchon is then put into place, ready for pushing in. |
 |
Using the staking tool, the bouchon is pressed into place (over a hole in the anvil), to level with the inside machined surface of the pillar plate. Rotate the anvil slightly so the bouchon rests on the flat suface and, using the same punch used to press it in, tap it lightly, which will slighty expand it and rivet it in place. If you want, you can machine both sides down down in a lathe to finish it off, but it is assumed you only have hand tools here. |
 |
Pressed into place now and ready for rivetting and chamfering the other side, then opening the hole to size. |
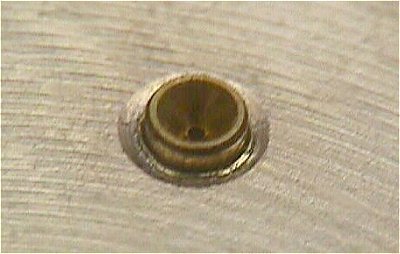 |
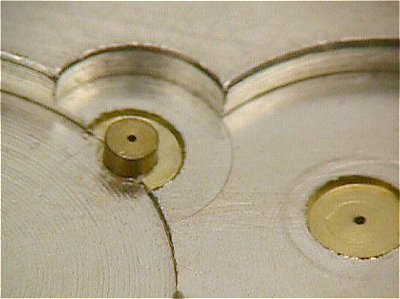
A view from the dial side of the pillar plate before rivetting. The excess length of the bouchon can be seen. It is easy to shorten it, and for this we use a chamfering cutter in the staking tool. Most staking tools have a selection of chamfering tools included in the set. For this operation, we will once again use the wheel type, a small one first to get started, followed by the large one. Chamfering with the large tool means we can make the oil sink not quite so deep as before, thus giving the hole a bit more bearing surface. |
 |
Chamfering complete, and at the same time, a new oil-sink is formed. The chamfering process also helps rivet the bouchon in place, so it is quite securely held. |
 |
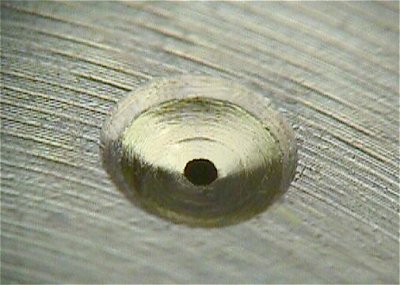
Using a pivot broach, the bouchon hole is carefully opened up to size. Unless you looked very carefully, you probably wouldn't even notice that the hole had been repaired. Ready to go back into service! |
 |
The tools used are (from bottom to top): Small pivot broach, medium pivot broach, smoothing broach, small chamfering tool, large chamfering tool, and staking tool (not shown). |
...and here's the movement, ready to go back into the case. It is an Elgin, grade 303 7 jewel movement, manufactured in 1927. Even their lower-end watches were nicely finished and decorated, with all screws beautifully polished and steel parts polished "black" or snailed. With a compensated bi-metallic balance and Breguet overcoil hairspring, these movements are capable of excellent performance.